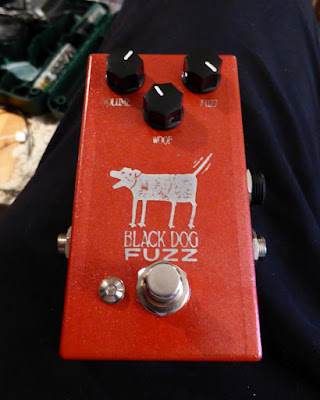
Here are a few techniques to make guitar enclosures pretty! You can of course combine these techniques to get the best looking pedal possible!
I will present you a lot of techniques, from the most basic ones to the most professional looking ones.
1. Bare aluminum enclosure
It is the simplest way to do: just let the enclosure in bare aluminum.Please don't do that.

It can be nice for prototyping though, you can improve the design later on if you are satisfied with the result. (practically speaking, it is very rare to improve the design... and I like good looking prototypes so not for me!)
Pros
| Cons
|
2. Polished / Brushed aluminum enclosure
This already look waaaaay better than the bare aluminum enclosure, and good news: it only take a few minutes to do!Here is an example of a Big Muff I have made this way:

Just grab some sandpaper (I recommend to use different grit, 150 for the beginning and 400 for final polishing), and start polishing your enclosure under running water. Finally, apply a varnish layer to protect it!
Beware: I noticed that the maximum quality of the polishing that you can get highly depends on the quality of the aluminum used. For instance, a "mirror" finish can be really difficult to achieve with low grade aluminum.
Pros
| Cons
|
3. Spray painting
I would not recommend spray painting guitar pedals enclosures. Read my post about it for more detail.
If you still want to go this way, apply really thin layers, at least three times. Wait between each spray for the paint to be dry enough. Finally apply a layer a varnish. For your health, please do it outside and wearing a mask!
Here is an amazing example done by Basic Audio:

Here is a very good step by step tutorial about how to use it.
Pros
| Cons
|
4. Hammertone finish
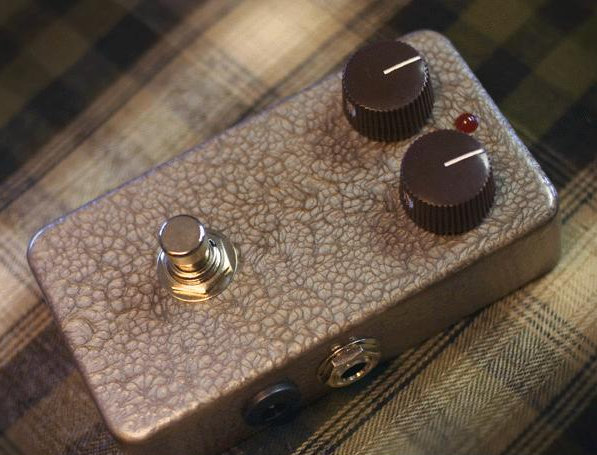
This is a special kind of spray painting that will give an amazing vintage feel to your pedals. You can create really beautiful textures with this kind of paint and it also does not wear off as easily as spray paint.Here is an amazing example done by Basic Audio:

Here is a very good step by step tutorial about how to use it.
Pros
| Cons
|
5. Powder coating
Powder coat is the kind of paint used on cars, and the one used on most guitar pedals as well. It looks very professional and there is a wide variety of colors available.
Here is an example of a commercially powder-coated enclosure:

You can either buy pre-painted enclosures, or make it yourself. Making it yourself would require some space and equipment, but it is not that hard.
Pros
| Cons
|
6. Aluminum etching
Aluminum etching is an easy way to have a custom design without spending too much time and money. It requires a bit of practice though.Here is a beautiful example:

You can find a nice tutorial here. It is not an easy technique to master (requires a bit of practice before managing to have a precise etch), but it can give really good results. Moreover, you get a fully custom design with anything you want on it.
Pros
| Cons
|
7. Reverse etching
It is very similar to the technique above, except that the etching is reversed, so the non-engraved parts sticks out of the paint that you can apply afterwards.I tried this technique once on one of my first pedals (+spray painting):

Cody of "They Remained Silent" is an absolute expert with this technique and has written up a really good tutorial about it. LIke etching, it can be a bit long before your perfectly master this technique, but it really worth it.
Pros
| Cons
|
8. Decal
Decals are a good way to have a fully personalized design.
Here is a good tutorial about it. Another nice one here on the Big Muff page.
If you are good with Photoshop or Illustrator, you can make your own design on your computer and use it for your guitar pedals. Print it on a decal paper, then apply it on your guitar pedals. You can use prepainting guitar pedals as well.
However, this technique is quite hard to master and to have good results. Most of the times, you will need to apply varnish layers. You can use Envirotex for a professional look,
Pros
| Cons
|
9. Laser engraving
Some folks use a laser etching maching to remove the paint and engraved their design.
The graphics are thus very sharp and neat looking: a laser cutting machine can be as precise as 0.1mm! Here is an amazing example by function f(x) Third Rail:


However, it does not work very well with dark colors scheme because of the color of the aluminum (dark grey). One other problem is that you will have to have access to a laser cutting machine, or find a supplier that would accept low volumes, and this can be difficult or expensive...
Pros
| Cons
|
10. Laser etched plate
More and more common on commercial effects these days. All the Greer amps pedals are made this way for instance.
In France, Anasounds makes its pedals with a similar process, on wooden plates, they look great!

You can combine it with powder coating to get even more pro looking DIY pedals. Like with laser engraved pedals, finding the right supplier can be difficult or expensive. However, it is generally easier than laser cutting the whole enclosure.
Pros
| Cons
|
11. Silkscreening
This technique is used by many professional pedal builders. It looks great and you can make hundred of enclosures in a few hours. Walrus used it for their pedals for instance:

It consists of a fine mesh that will let a special acrylic paint goes through only in specific parts of it (like a pochoir). With a râteau, you can pass the paint over this mesh on a powder coated enclosure, and directly print your graphics on the enclosure. Here is a video of how it is done:
It is a great technique if you have many many similar pedals to make in a row
Making this mesh is quite a complicated process involving projecting UV light on a light sensitive plate, but fortunately, you can order these meshes to specific suppliers. Applying the paint is quite a messy process, which requires both space and practice.
Once the technique mastered, you can make lots of pedals very quickly. The graphics will be very precisely printed on the pedal, and will last for a very long time. It looks really professional. However, the only problem with silkscreening is that you can only print one color at a time. You have to make one mesh per color and it can become quite time consuming if you want to use more than 3 colors... So adapt your graphics!
Good news is: you can apply this technique to many other usages like making t-shirts or posters for your next gig.
This is the technique I use for my commercial projects like the Dolmen Fuzz or Montagne Tremolo:

Pros
| Cons
|
12. UV printing
The nice part about UV printing is that you can print litteraly anything you like on your enclosures :)This is the technique I use for my commercial projects like the Dolmen Fuzz or Montagne Tremolo:

UV printing machine are highly expensive, however it is possible possible to lease it. That is what is done by many professional like Kelley Electronics. A solution easily accessible to hobbyist is to use Pedal Parts Plus services.
They can UV printing pedals for a reasonable price. However they are based in the US so you can unfortunately expect some shipping delays and customs issues... Anyway the people there are great and really helpful so I highly recommend it.
Pros
| Cons
|
There you go! I hope that you liked this post! Show me your best guitar pedal and let's share our ideas on the Coda Effects Facebook page. You can also follow Coda Effects on Instagram.

10 Comment
Hey merci pour le lien vers nos pédales ;)
AnswerEn plus l'article résume bien l'ensemble des finitions possibles !
Hi! Great article! I'm currently painting a pedal with the spray painting method, but the next one i wanted it to be like your muff. I really like it. But i'm a bit confused on what i have to do after the sanding. Is the varnish layer the same clear coat of the spray painting method? I asked in some shops and they said that there is no coat that will stay on raw alluminium without a primer.
AnswerI found out today that the die cast aluminum enclosures are extremely challenging to anodize (Type II), but a Chromate conversion coating is quite easy if you have access to the solution, and produces some very cool finishes. Just dip it in, and pull it out when you think it looks cool.
AnswerI will have a look, I am not familiar with anodizing enclosures!
AnswerI started using equipment I got from these guys - https://www.eastwood.com/hotcoat-powder-coating.html Assuming you already have an air compressor you can get everything you need for $200 - $300 dollars. You'd be limited to doing say 4 - 8 pedals at a time because of the size of the oven but that's more than enough for any of us unless our little side project building guitar pedals has really taken off.
AnswerOne other option is CNC routing.
AnswerDisadvantages: there are a ton, including most of the laser engraving disadvantages, plus the potential for damage when doing fine detail with small cutters
Advantages: You can get a really nice variable 3D carve, potentially better than etching
This is a great primer for any DIYers or designers thinking about pedals for the first time. I'm helping a friend design a new pedal. Does anyone have solid vendor/resource recommendations for producing logo plates? We'd love to consider using plastic (acrylic?, white maybe) and or etching on metal (thin enough to be glued on, or thick enough to screw on?)
AnswerMerci beaucoup pour ces tutos, est-ce que vous auriez des éléments graphiques de base par hasard ? Par exemple le contour d'une 1590B, les graduations et trous de perçage pour les potentiomètres etc ... ?
AnswerAmong the products listed on the site, which one is the best?
Answerhttps://latestmusicalinstrument.com/best-delay-pedal/
I loved this post. You describe this topic wonderfully. When hiring home contractors it is critical for pick a trusted name in construction. Experienced and efficient staff should shoot for excellence and seriously consider every detail in your home. https://royalcbd.com/product/cbd-oil-2500mg/
Answer